Getting Started
This tutorial assumes you have already installed the mod or modpack. If you'd like instructions on how to install our Official Modpack, you can find instructions for doing that on Java (Forge) here, on GDLauncher here, and on the Curseforge Launcher here.
Quick Walkthrough
Before you get started on your new colony, you should find your perfect location. You need a large enough area for a full city-at least 8x8 chunks, and decently flat.
You should also gather as many resources as you can-wood, as well as cobble, coal, iron, flowers, string, leather, wool, saplings, and food.
Step 1: Supply Camp/Supply Ship
Once you have chosen a location for your colony, you must place a Build Tool , the remaining camp/ship is just decoration. You can leave it or tear it down.
Step 2: Town Hall
The Town Hall block is what actually creates the colony. It also functions as the center of it. This is where you start using the build tool to place buildings. Using the build tool ensures you can see exactly where the building will be, which direction it will face, and if it is at the right Y level (some buildings need to be raised to the correct Y level).
Once the Town Hall block is placed, you will start receiving your initial 4 citizens.
Step 3: Builder
Before anything can be built, you need a Builder Builder Builder Builder Builder Builder Builder Builder Builder Builder Builder Builder . The Builder must build their own Builder's Hut before building any other huts, and they cannot build or upgrade a hut to a higher level than their own hut level.
Step 4: Tavern
Your colonists will need a place to sleep and a house, so it is recommended to build a Tavern next. The Tavern also allows visitors to come to your colony, and you can recruit them to stay as citizens.
Step 5: Food
The next major thing you need for your colony is food. The fastest way to get food is to build a Fisher's Hut . You could build a Farmer's Hut or one of the animal herders, but a Fisher is faster. Building a Restaurant may also be advisable if you don't want to feed your colonists (or cook their food) by hand.
Step 6: Forester
If your style is wood, it's recommended to build a Forester's Hut next. That way your new Forester Forester Forester Forester Forester Forester Forester Forester Forester Forester Forester Forester can start gathering wood for your next builds and for tools and other items.
Step 7: Miner
Stone and ores are another major need for any colony, so a Mine is the next logical step.
Step 8: Warehouse and courier
At this point, you might be tired of bringing all of the resources to the Builder and taking them from the Fisher, Forester, Miner, etc. You also might want to store items in one place. Well, the Warehouse and Courier's Hut are the solution you are looking for! Courier Courier Courier Courier Courier Courier Courier Courier Courier Courier Courier Courier transport items between the Warehouse and all of the workplaces. The Resource Scroll may be helpful!
Step 9: Rest of the Colony
This is where you need to decide what you need next, based on how you play and what your colony needs. But you have several things to look at. Once you get seven citizens you can get attacked by raiders and you may want to build a Guard tower , or you may get a sick citizen and want to build a Hospital , or you may decide you want a Sawmill to make the needed items for a worker. Or you may just want to have a specific worker, or you found a great place for a certain hut. You decide how your colony will grow!
Detailed Walkthrough
If you're here, CONGRATULATIONS! You have already installed MineColonies and are ready to embark on an adventure to explore, conquer and establish your own colony. Work hard and turn it into a thriving town. Hone your leadership skills and grow grow grow into a city! Lastly, can you be a grand leader and finally achieve a metropolis? (Check your ingame MineColonies Achievements.)

To avoid mistakes and frustation, read through this entire guide carefully before starting to play.
Placement of the Supply Ship or Supply Camp
To place the Supply Camp and Ship, you need to have a large enough body of water (at least 32 x 20). To place the Supply Camp and Ship, you need to have a large enough flat, clear piece of land (at least 16x17 blocks).
When you place the Supply Ship/Camp, it will spawn a chest that will contain the Town Hall block and the Build Tool . Once the Supply Ship/Camp is placed, you can't place another in the world.
Place the Supply Ship/Camp by right-clicking the item directly on the water/ground -- if you have a build tool already, don't use it for this (you're expected to get the tool from the camp/ship rather than already having one).
Hint: If you're not able to place the Supply Camp/Ship, try it block by block: one to the right, left, closer or further from the area you cleared. The area cannot contain any holes or have any flowers, grass, ferns, seaweed, coral etc.
Town Hall
The protected area of your colony (once the Town Hall has been placed) will be a square 4 chunks in radius, measured from the chunk where you placed your Town Hall block the first time (with the default config). Therefore, plan carefully where you want to place your Town Hall . 64 blocks (4 chunks x 4 chunks) in every direction from that chunk will be your protected Town area including mountains, hills, lakes, oceans, caves, world generated structures, etc. from bedrock to sky limit.
Hint: The most important tool you will need for the entire mod is the build tool (check our Build Tool page). Obtain one from the Supply Ship/Camp or craft another so you can place all the huts (including the Town Hall ) in the perfect spot.
Build Tool Video
Due to the protected area of each colony, you have to carefully scout your surrounding to make sure you are clear of any other colonies nearby preventing you from placing your Town Hall or limiting your colony area in that direction (in multiplayer, etc.). If there is another colony too close to your current position, you won't be able to place a Town Hall .
Location info of the next closest colony exists in the debug screen (displayed when you press F3). If there is a colony close to your current position, it will also show you the required distance away to place your Town Hall .


For example, in the official MineColonies server it will be the default 4 chunk radius (4 + 4 + 1 {center Chunk where Town Hall was placed} = 9 chunks or 144 total blocks required). It therefore, will tell you: "Next colony is XXX blocks away. (272 required to place a colony)."
Now, after you have explored, thought carefully, planned, and found the perfect spot to start your colony, let's take a look at the steps to get your colony running!
Setting Up Your Colony
Step 1
Get enough materials and craft your Supply Ship/Camp, then place it by right-clicking a block with it (do not use the build tool, if you happen to already have one). There will be a chest (or Rack ) inside the placed Ship/Camp with a Town Hall block and a build tool.
Hint: Gather as many materials as possible to give to your Builder Builder Builder Builder Builder Builder Builder Builder Builder Builder Builder Builder when they start building. They will ask you for all kinds of materials for each building or upgrade, depending on the style of building you have chosen. The materials needed for most styles will be mainly wood, cobblestone, and torches for the lower levels. Further upgrades will require more elaborate materials.
Step 2
After you have carefully decided where you want to place your Town Hall (remember, the position where you placed the Town Hall block at first will be the center of your colony's protected area. Once placed, the area will be set and cannot be changed), use your Scan Tool to place the Town Hall . Once you commit to the placement of the Town Hall (the green checkmark), the Town Hall block will be placed. To officially start a colony, you need to right-click on the block, then select Create New Colony. Once you've done this, your initial four citizens will start appearing!
You can now right-click the Town Hall block again to look what else you can configure in your colony, like your colony name!
Step 3
Before any other building can be built, you must craft the Builder's Hut block and use your Scan Tool to place it. Once you commit to the placement of the Builder's Hut (the green checkmark), the block will be placed and a Builder will be automatically assigned (or you can manually assign one with the best traits for a Builder if you changed this in the setting tab in the Town Hall its GUI).
You now officially have a Builder Builder Builder Builder Builder Builder Builder Builder Builder Builder Builder Builder ! CONGRATULATIONS!
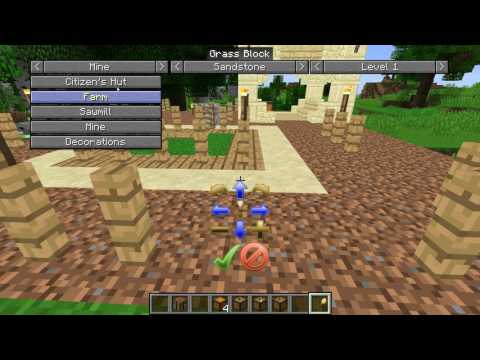
When accessing the Builder's Hut block by right-clicking on it, you will see a GUI with different options:

You will have to click Build Options on the Builder's Hut , then click Build Building. This will give your new Builder Builder Builder Builder Builder Builder Builder Builder Builder Builder Builder Builder the build assignment so they can build their own hut first. If the Builder's Hut is not built, the Builder Builder Builder Builder Builder Builder Builder Builder Builder Builder Builder Builder cannot build any other buildings.
The Builder Builder Builder Builder Builder Builder Builder Builder Builder Builder Builder Builder will ask for the materials they need. Right-click on them when they have a red icon above their head to see the materials they currently need.
Hint: If you see that the Builder hasn't finished a build order and you don't see them asking for any materials, go to the Builder's Hut, recall the Builder, and wait a bit to see what they need. Also, check page 2 of the Builder's Hut GUI and see what resources are in red (those are missing resources).
Step 4
Once the Builder has finished their hut, you're ready to start building any other building you want! Just craft the desired block and use your Build Tool to place the building. Once it's placed, go into the GUI for the new block, click Build Options, and then click Build Building. It's that simple!
Hint: Consider upgrading the Builder's Hut to level 2 as soon as you can so the Builder can upgrade other buildings.
Final Notes
You have now completed the most important steps to start and create your colony!
Your question now is probably, "What to build next?" The Town Hall , Mine , Forester's Hut , Farmer's Hut , Fisher's Hut , Guard tower , Courier's Hut , Bakery , Restaurant , and more are probably good places to start.
But you start with only 4 citizens! Now what? Well, the next step after your 4 citizens are employed and are working hard is to plan and place the Residence House . This will give you additional citizens for each level of a House you build in your colony (after your inital four citizens are housed)! Now, what do you do with so many citizens? You cannot assign more than 1 worker per hut. Therefore, consider building additional huts for more Miners, Foresters, Builders, Farmers, Fishers, and many more! If you struggle with keeping track of what everyone needs, consider making a Resource Scroll . Though you only need one Clipboard, you can make a Resource Scroll for each Builder to keep track of their needs!
Hint: Upgrade your huts to the highest level possible (level 5 for all of them except the Tavern ) to get achievements (and increase the speed at which the worker levels).
If changes are needed or you think there is content missing, feel free to edit this page or submit an issue for us to make edits. - MineColonies Wiki Team